Installing, starting, and stopping the new Jetty Service
After upgrading to 7.3.2, Jetty should be configured based upon your current JBoss configuration. All customer configurations for Jetty are located in the jetty/base folder.
During upgrade or a new installation, the following files will be created for you in Jetty:
- jetty/base/etc/installation.properties
- jetty/base/etc/perc-ds.xml
- jetty/base/etc/perc-ds.properties
The installation.properties file will contain settings for HTTPS if you had HTTPS set up prior on the JBoss installation. Jetty will exclusively start with HTTP until you enable HTTPS.
Directions on how to Enable HTTPS and configure HTTP and HTTPS ports
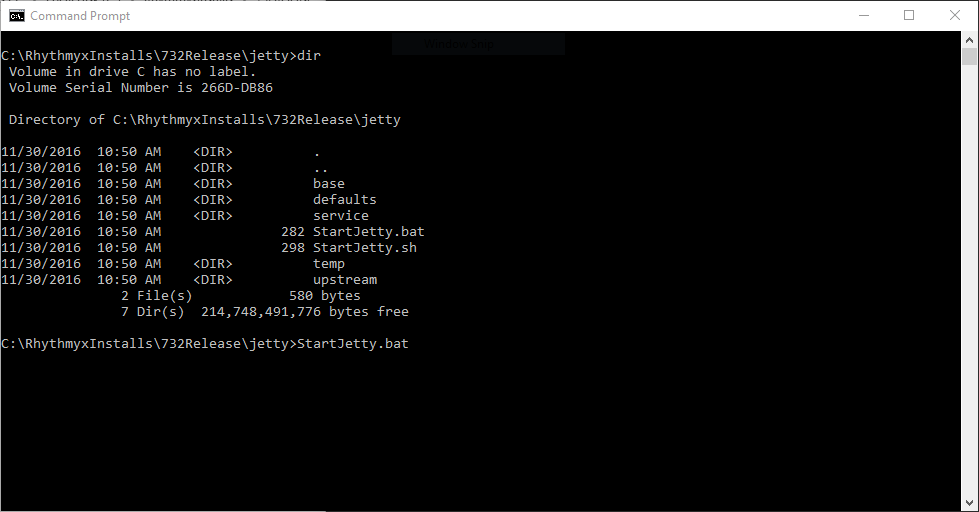
Starting Jetty through Command line
Patch 732_20171004 updated The StartJetty.sh script for linux to be able to safety run as root, or the user that owns the Rhythmyx root folder. It will show an error if run as any other user. It will also check to make sure the instance is not already running in another shell or as a service.
Windows users should ensure that the current JBoss install is not already running and that any other instance is not already running.
Windows

Linux
Jetty will always run as the owner of the Rhythmyx base folder since Patch 732_20171004. Installing the service will change ownership of the contained files and folders to ensure they are consistent.
To find who is the owner in user, group format:
Next cd into the {RHYTHMYX_HOME}/jetty directory
Installing the Rhythmyx Jetty Service and disabling the old JBoss service
Installing the Jetty Service will allow Rhythmyx to start via service rather than manually, and allow it to startup when the system boots up.
Ensure that Rhythmyx is not already running. Additionally, the old Rhythmyx service should be disabled so that it does not start automatically on Startup. Otherwise the Jetty Service will conflict with the old Rhythmyx JBoss service.
Disabling the old Rhythmyx JBoss service on Windows
Disabling the old Rhythmyx JBoss service on Linux
Since Patch 20171007 The service install will warn if there is already a JBoss service installed. You can automatically remove this service with the cleanupJBoss argument to the install-jetty-service.sh
Installing the new Rhythmyx Jetty service on Windows
Execute the following batch script to install the jetty service: install-jetty-service.bat install
Installing the new Rhythmyx Jetty service on Linux
Starting and stopping the Jetty service
After installing the Jetty service, it will automatically start every time the system is booted.
Windows
To start and stop the Jetty Service on Windows, use the same install batch file to start and stop Jetty, using the following parameters:
install-jetty-service.bat startinstall-jetty-service.bat stopYou can also use windows regular service management tools.Linux
You will usually have to logged in as root or use the sudo command and have permissions to start and stop the services.
Ubuntu/Debian/RHEL6
To start and stop the Jetty Service on Ubuntu, Debian, and RHEL6 use the following commands:
service rxjetty startservice rxjetty stopCentOS 6
To start and stop the Jetty Service on CentOS6, use the following commands:
chkconfig rxjetty onchkconfig rxjetty ofRHEL7/CentOS 7
To start and stop the Jetty Service on CentOS 7 and RHEL7, use the following commands:
systemctl start rxjettysystemctl stop rxjettyRemoving all JBoss related Files
Now that JBoss is disabled and Jetty is up and running, you may now remove all JBoss related files.
Please review Removing JBoss from install, and have Rhythmyx exclusively use only Jetty on what files should backed up and what files can be removed.
