Creating a Template Using Live First
Creating a Template using LiveFirst
LiveFirst provides the ability to create a template by importing a site and then using an imported page as the basis of a new template. There are three ways in which a template can be created using LiveFirst.
- During the initial import, the home page of the imported side is converted to a template
- On the Design Manager, a user can Add a template by identifying a URL and importing that page to serve as a template
- Once pages have been imported, you can select an "Unassigned" page on the Design Manager and convert it to a template
Once you've imported your site (see Live First Overview) you can begin the process of transforming the page that you imported into a template comprised of regions and widgets. To do so, first navigate to the Layout Tab of the Template Editor.

Design Inspector
On the template editor, you will see the Design Inspector button. The Design Inspector provides the ability to examine an HTML widget and determine if it can be broken down into regions based on the <div> structure of the HTML. Starting with the outer-most container, you can break down the pages into stacked and side-by-side regions in order to isolate the sections of the page that will be added to the template and the sections of the page that will be made editable to content contributors.
1. Click the Design Inspector button
2. Move the cursor over the page. As you do so, potential regions will be highlighted in green. Click a region to select it.
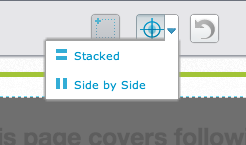
3. Click the drop down arrow next to the Design Inspector and select Stacked or Side by Side as appropriate.
Note: If the page cannot be broken down any further it will appear as Orange when you hover over a region. This occurs when the system cannot detect a div structure to use to break down the page (see Known LiveFirst Limitations for more information.)

When you make a region, what you are doing is splitting the HTML widget into two sections based on the <div> structure of the selected region. For example, here is what stacked regions would look like:
<Div id="top">
</div>
<Div id="bottom">
</div>
Side-by-side is for when you are using floats to have regions appears next to one another. For example:
<div id = 'left' style = 'float:left'>
</div>
<div id = 'middle' style = 'float:left'>
</div>
<div id = 'right' style = 'float:left'>
</div>
Undo
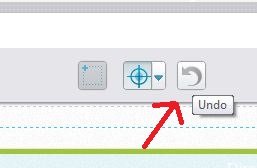
As you are breaking a page down into regions, you may go "too far" in splitting the page. In this event you can Undo the change you made. You can undo all the way to your last save.
The Undo button is only visible when you have selected the design inspector tool. If you use the Design Inspector to split a page into regions, and then turn off the Design Inspector to drag and drop a region onto the page, and then return to the Design Inspector, you will not be able to Undo the action of dragging the region onto the page.
Promoting content to template
Once you have broken down a template into regions and widget, you choose to promote content from the page to the template. For example, the top navigation section of the page and footer of the page can be promoted to the template
Use the following steps to promote content to a template:
1) Open the template's Content tab.
2) Select the widget containing the page level content.
3) Click the Promote Content to Template icon.
4) The content that was at the page level is now at the template level and can be edited if needed. It will appear on all pages using this template.
Convert HTML to Rich Text
Percussion CMS includes a Rich Text Widget - a content editor with an interface similar to tools like Microsoft Word or Google Docs to make the process of editing content easier for your typical content contributor. Most content contributors will feel more comfortable authoring content in this format as opposed to HTML. You can convert any HTML widget to a Rich Text Widgets so that content contributors will feel more comfortable authoring content.
Use the following steps to Convert an HTML Widget to a Rich Text Widget:
1) Open the Layout view of the Template.
2) Click the Convert to Rich Text icon.
3) You will be prompted with a Warning Message. To turn off future warnings check "Do not show again." Once the HTML Widget is converted to a Rich Text Widget, you will not be able to convert it back.
4) Click OK to convert.


