Creating a Page
When creating pages in CM1, you have two options: using the 'Add New' option Home Screen, or clicking the New Page button in the Finder. The main difference between the two methods is that when using the Home Screen you can choose the location of the new page, where as using the Finder always creates a page in the location you were in when you started the process.
Creating Pages through the Finder
- To create a page from the Finder, click the New Page icon on the right hand side:
![]()
Please Note: the New Page option is always visible in the Finder but will be grayed out until you select a valid location (i.e. somewhere within Sites, rather than Assets or Design).
- Select the template you want to use for the page. The selection defaults to the first template in the list.
- Enter the Page Link Text. The text in this field will be used to identify the links generated automatically by CM1. You can use any character. The Page Link Text must be different from the link text used for any other sections within its parent section.
- The Page Title is automatically filled with the text from Page Link Text, but you can change the value in this field.
- The Page Name is automatically filled with the text from the Page Link Text, but spaces and underscores are converted to dashes. Uppercase letters are converted to lower-case letters. However, you can manually change the values in this field. The following invalid characters are automatically omitted from the Page Name:
- Characters that are not valid in file names on Microsoft Windows operating systems: \ / : * ? " < > |
- Characters that are not safe in URLs:# (hash, pound, or octothorpe; used in HTML anchors)
- Semicolons (;), used to append jsession IDs to URLs
- % (percent sign; used to encode or escape characters in URLs.)
- Once you click Save, your newly created page will open up for you to start editing.
Creating Pages through the Home Screen
The Add Content Wizard is "configuration aware" meaning that certain options are displayed or not depending on your site configuration. For example, if a blog has not been created, then the blog option will not be available in the wizard. If more than one site has been created then you will be prompted to select a site when saving a page. Otherwise, you will not see this field.
Since most casual content contributors only use a few templates, asset types or file locations, the system learns these and presents them in the process of adding content. For example, when you go to create a page, you will see lists of recent templates and folders, based on locations that you have most commonly saved content.
- From the Home Screen, click the “Add New” button:

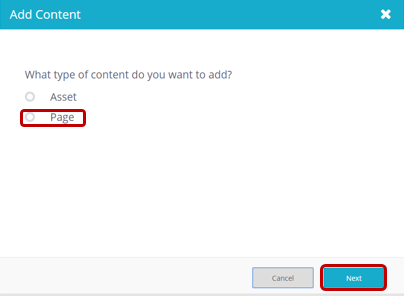
- A screen now pops up asking what type of content you want to add. To add a page, choose Page and click Next:

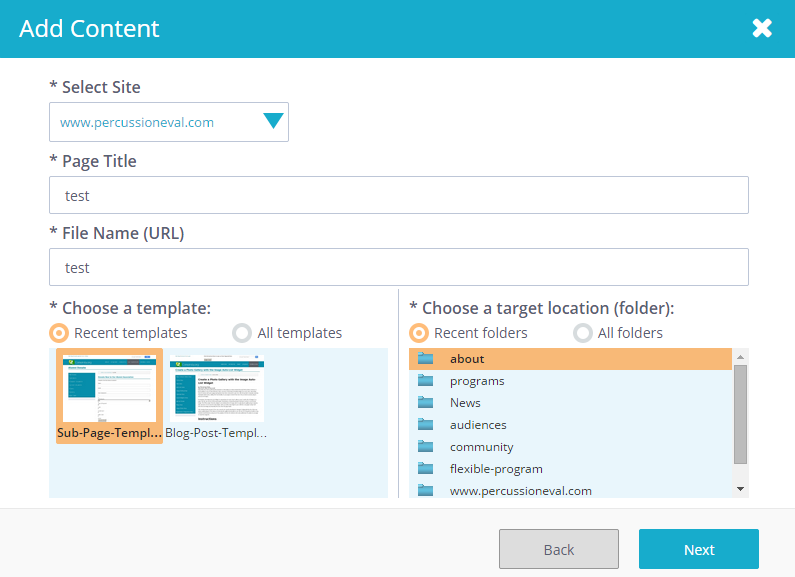
- You can now choose a site, page title, file name, template and target location for the page. Note that the page title is what will show in your browser window whilst the file name is what will be used in the URL.

- After clicking Next, your newly created page will open up for you to start editing.
